Mold on drywall is like that uninvited guest who overstays their welcome. It sneaks in, sets up camp, and suddenly your walls are hosting a fungal fiesta. Not only does it look unsightly, but it can also wreak havoc on your health and home. If you’ve spotted those pesky patches, don’t panic! With a little know-how and the right approach, you can send mold packing and reclaim your walls.
Understanding Mold Growth on Drywall
Mold growth on drywall occurs due to specific conditions. Identifying these factors helps in managing the issue effectively.
Causes of Mold on Drywall
Excess moisture creates an ideal environment for mold. Humid conditions, especially in areas like bathrooms and kitchens, promote growth. Water leaks from pipes or roofs provide direct sources of moisture. Poor ventilation leads to trapped humidity, allowing mold spores to thrive. In addition, mold spores often come from outdoor sources or existing indoor materials like wood. Understanding these causes aids in taking preventative measures.
Signs of Mold Infestation
Visible patches on drywall often indicate mold presence. Dark spots or discolorations appear as mold colonies develop. A musty odor frequently accompanies mold, signaling an infestation. Warping or bubbling of drywall can result from moisture damage, signaling a deeper issue. Noticing signs like respiratory problems among inhabitants reinforces the need for inspection. Identifying these signs early enables prompt action to mitigate mold-related risks.
Preparing for Treatment
Preparing for mold treatment involves taking essential safety measures and gathering necessary tools. Following these steps ensures an effective approach to mold removal.
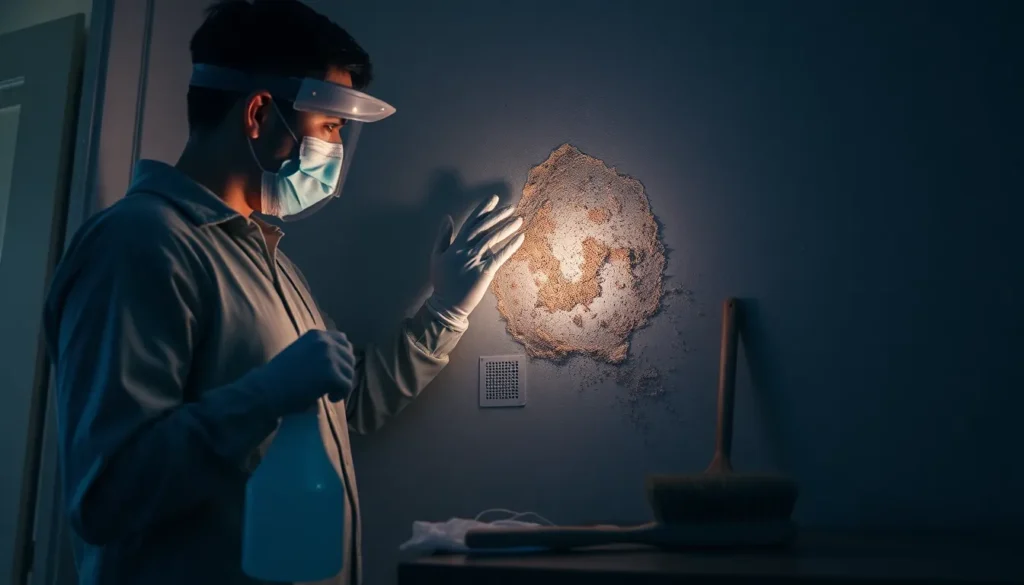
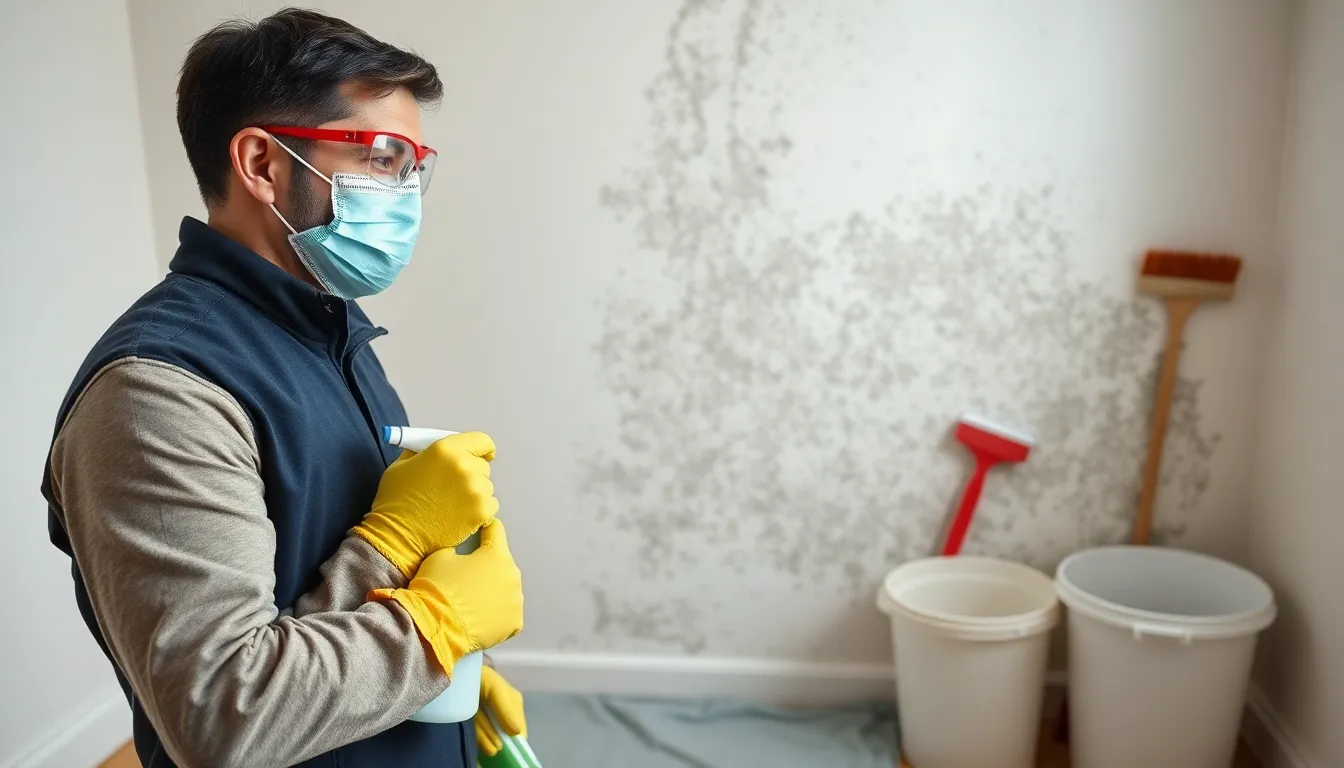
Safety Precautions
Safety precautions play a critical role in mold treatment. First, individuals should wear protective gear, including gloves, masks, and goggles, to avoid exposure to mold spores. Next, ensuring good ventilation in the workspace promotes air circulation, reducing inhalation risks. Individuals should also seal off the affected area, preventing spores from spreading to other parts of the building. Evaluating the severity of the mold infestation helps in determining if professional assistance is needed. Prioritizing personal safety during treatment protects health and minimizes hazards.
Necessary Tools and Materials
Necessary tools and materials make mold treatment efficient. Start with a spray bottle for applying cleaning solutions directly to the moldy area. Use a stiff brush to scrub the mold from the drywall effectively. In addition, having a bucket on hand allows easy disposal of contaminated materials. Opt for cleaning agents specifically designed for mold removal, such as vinegar or commercial mold removers, to ensure effectiveness. Lastly, a drop cloth protects the floor and surrounding surfaces from debris while treating the affected area. Gathering these items prepares individuals to handle mold efficiently.
Step-by-Step Guide to Treat Mold on Drywall
Treating mold on drywall requires careful steps for effective removal and restoration. Follow these actions to ensure thorough cleaning and repair.
Cleaning the Mold
Begin by preparing a cleaning solution using either vinegar or a commercial mold remover. Spray the solution directly onto the moldy area. Allow it to sit for at least 10 minutes to penetrate the mold. Next, take a stiff brush and scrub the affected region. Focus on removing all visible mold patches. Afterward, wipe the area with a damp cloth to clear any residue. Ensure proper ventilation throughout the room during this process. Dispose of any sponges, cloths, or materials used in the cleaning. Lastly, monitor the treated area for any signs of mold returning, addressing any issues promptly.
Repairing Damaged Drywall
Examine the drywall for any signs of damage after mold removal. If the drywall has become soft or disintegrated, cutting out the damaged sections proves necessary. Use a utility knife for precise cuts. Measure and mark the areas needing replacement accurately. Install new drywall pieces to fit snugly into the gaps. Secure these pieces with drywall screws, ensuring they align properly with existing sections. Apply joint compound over seams to create a smooth surface. Allow it to dry completely before sanding for an even finish. Finally, repaint the patched areas with mold-resistant paint to prevent future growth.
Preventing Future Mold Growth
Preventing future mold growth requires consistent measures. Keeping mold away involves controlling factors that encourage its spread.
Maintaining Indoor Humidity
Humidity levels in indoor spaces should stay between 30% and 50%. Using a dehumidifier is effective in areas like basements where moisture tends to accumulate. Regularly checking humidity can help prevent conditions ideal for mold growth. Ensuring proper ventilation in bathrooms and kitchens also reduces moisture buildup. Opening windows and using exhaust fans during and after showers are crucial steps.
Regular Inspections
Conducting regular inspections for mold signs is vital. Inspect areas prone to moisture such as bathrooms, kitchens, and attics. Look for discoloration, water stains, or any musty odors. Noticing issues early allows for prompt action. Additionally, keeping an eye on plumbing and roofs prevents leaks that contribute to mold growth. Regular home maintenance protects drywall from mold infestations.
Addressing mold on drywall isn’t just about aesthetics; it’s a crucial step for health and safety. By understanding the conditions that foster mold growth and recognizing the signs early, homeowners can take proactive measures. The right tools and techniques make mold removal manageable, while safety precautions ensure a secure process.
Repairing any damage and applying mold-resistant solutions can help prevent future infestations. Regular maintenance and monitoring indoor humidity levels are essential for long-term protection. With diligence and the right approach, it’s possible to keep drywall mold-free and maintain a healthy living environment.


